Reading time: 4 minutes
In this article, I will sum up the latest cool thing I've learned about Docker containers. It's networking! Truly awesome topic in a truly awesome environment. Just keep in mind we are talking specifically about Linux here.
So, I have recently watched a video from NetworkChuk, which is a great and entertaining YouTube channel for learning IT in general and networking specifically. The reason for that was that I wanted to understand, how to build my Lab, so I can access containerized apps locally by using domain names. I have read a lot of cases, where you would use some dedicated machine, on top of which you would create VMs and build a network around it, like it is described over here Building a Software Development Home-Based Lab or even create a Kubernetes cluster out of these VMs (see this resource Kubernetes at Home). All of these bright ideas were not for me because I cannot create VMs as I am already running my Dev server on a remote VM, so I had to create some kind of a virtual network with a DNS server on the same machine. In other words, I had to understand, how can make these isolated environments or containers located on a virtual LAN to be resolved by a DNS server and all that on the same VM.
So I have started playing around with Docker networking. Overall there are actually 7 types of networks in Docker. You can quickly learn about these by reading the blog post from Aiden Arnkels-Webb or again watch this cool video NetworkChuk. In general, by default, you use the first type of the network (or a driver), which is called Default Bridge. Whenever you build a container it is added to this network. You can check it on the list of virtual interfaces with a simple ifconfig command and you will see something like this:
docker0: flags=4099<UP,BROADCAST,MULTICAST>  mtu 1500
        inet 172.17.0.1 netmask 255.255.0.0  broadcast 172.17.255.255
        inet6 fe80::42:1eff:fef6:dff4  prefixlen 64  scopeid 0x20<link>
        ether 02:42:1e:f6:df:f4  txqueuelen 0  (Ethernet)
        RX packets 15  bytes 740 (740.0 B)
        RX errors 0  dropped 0  overruns 0  frame 0
        TX packets 44  bytes 12860 (12.5 KiB)
        TX errors 0  dropped 0 overruns 0  carrier 0  collisions 0
Another relevant network you may use is Default Host. Basically by using this driver, your containers are connected to the same network as the host itself. This network type is always present in docker as the Bridge does, but it is not used by default. In order to expose your container to this network you are required to specifically tell your container to run on it with --network host parameter added to your docker run command. Just keep in mind that you cannot specify your own ports with this approach, your app would use the ports specified in the image and these ports will be listening on the host network while the container is running. I have used exactly this network type to run my DNS server locally. As a DNS server I had chosen Bind DNS or BIND9 (in a Docker container, of course). There is actually a good video about this DNS from Christian Lempa.
The last one Docker network type, which we will discuss today is IPVLAN in L3 Mode. With this one, the host acts as a router. By creating such a virtual network I can add my containers to this network and configure the DNS server to resolve IPs of these apps. I will say no more, just play around with it yourself by following these steps:
- Create a new virtual network interface and link it to your external one (either wlan0 or eth0):
sudo ip link add docker.vlan01 link eth0 type ipvlan mode l3 private
sudo ifconfig docker.vlan01 up
sudo ip addr add 192.168.10.1/24 dev docker.vlan01- Setup docker network:
sudo docker network create -d ipvlan \
 --subnet 192.168.10.0/24 \
 -o parent=docker.vlan01 \
asgard- Run some container (let it be nginx):
sudo docker run -itd --rm --network asgard --ip 192.168.10.11 --name thor nginx- Then check your web-server connection:
curl 192.168.10.11Once you're done, then you may adapt your configuration of a DNS zone to access this web server with a domain name (once again refer to the video from Christian Lempa)
And if we look at the end result, we may see the following picture (that's from Portainer):
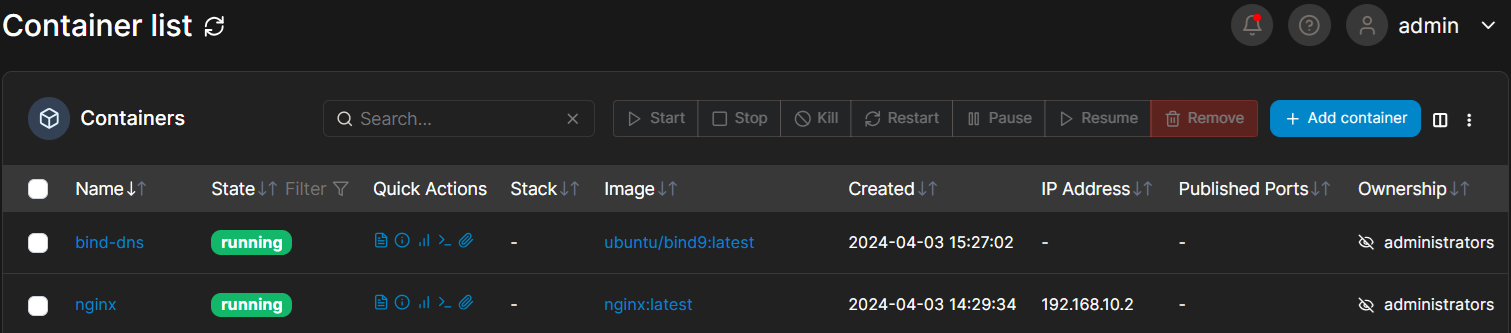
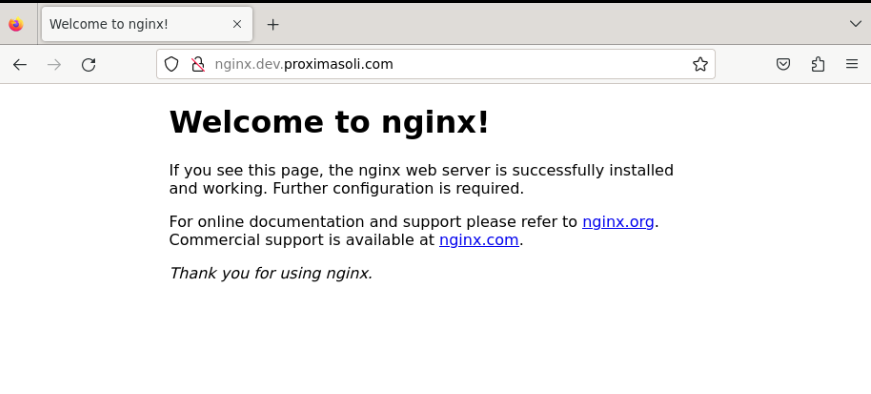
After adapting the Bind DNS config a bit, I can access this Nginx web-server with a specific domain name on my VM host:
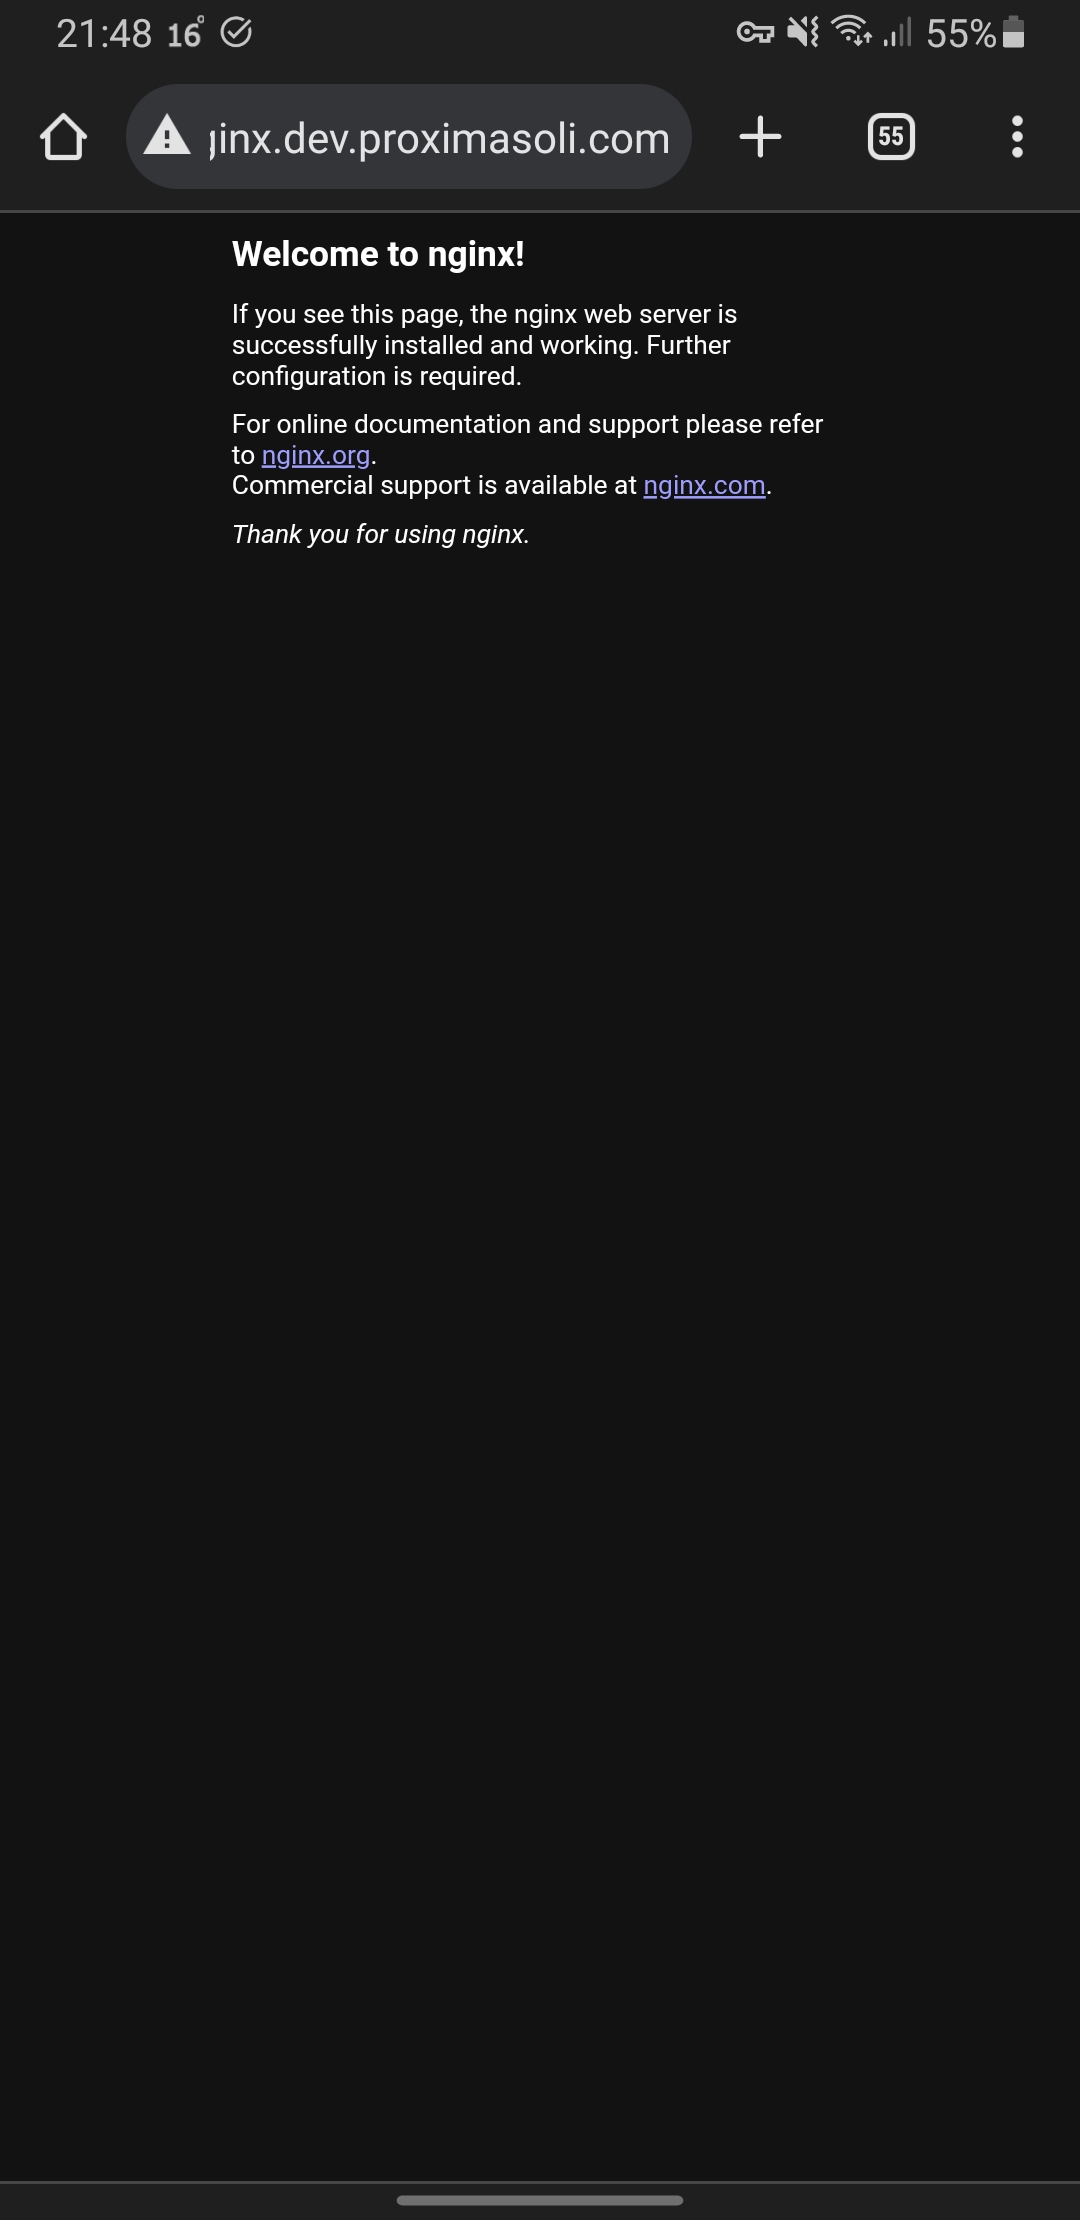
I was actually so excited once I got it to work! Moreover, I have added a VPN with Wireguard, so that anyone, who will connect to this server can also access these apps the same way. For example, here is how it looks from my smartphone (you can tell I am connected to a VPN tunnel by this little key in the top right corner):
Now I can add more containers, get them running on the same VLAN and use my own domain names to access these. That's cool!
To sum up. I am really glad, that I have discovered Docker Networking as it is a great way to learn more about networks and build cheap and simple Home Lab!
As always be curious, be proactive and take care!
Best regards,
Ed